Friday, March 28, 2014

Asparagus Quiche with Spaghetti Squash Crust

I got the idea for this recipe from Pinterest, but I ended up tweaking it a little bit and have an idea for what I will do differently next time already.  I love quiche, but never make it because the one time I tried before was a disaster!  If I'm being completely honest, I was really nervous about this because really, my favorite part of quiche is the crust.  It's buttery, flaky and oh so delicious...  I'm getting side-tracked!  So, when I decided to try this quiche, I realized that I was just going to go into it with different expectations.  


So, yesterday I roasted my squash.  I used all the muscle I have in order to chop it in half lengthwise, scooped out the seeds, and then roasted it cut side down for about 45 minutes on 400 degrees.  
 I did this step a day ahead because I had the time.  Quiche itself is time consuming, so getting the first step done and out of the way made the whole process go more smoothly. 


So, because I cooked the squash ahead of time, it was scooped out (just scrape it all out with a fork) and cooled by the time I needed to press it into my pie plate.  I pre-heated the oven to 400 and then pressed the squash into it.  I then sprinkled about a handful of grated Parmesan cheese over the squash and then put it in the oven for about 10 minutes.  Now, I did this in hopes that it would help it harden and crisp up a little before I added all the filling stuff, but I'm pretty sure it didn't do anything.  Next time, I'm going to pat it all dry with a paper towel before baking it.  Maybe that will help with the browning.  

Anyway, while that was baking, I peeled a big shallot and threw it in my mini food processor.  I heated a medium skillet with a little olive oil in it and then started the shallots going over medium to medium low heat.  While they are softening up, I cut the ends off of the asparagus (snap one to see where the natural break is, then cut the rest at that same length) and then cut them into 1 inch pieces.  Once you have them ready, toss them into your pan and cook them for just a few minutes.  Don't get them get too soft, just till the green pops and they are tender. Once you get those in the pan, take your "crust" out of the oven.
 
While the asparagus is cooking, mix together 5 eggs, 1 cup of milk, 1 cup of cheese (I grated Gruyere, but Swiss would be good, too, salt, and pepper.  Whisk that all together and then put the shallots and asparagus into the crust and pour the egg mixture over top.  Put it in the oven and let it bake for about 45 minutes.


 Here it is out of the oven.  Notice my beautiful new butcher block counter tops in the background.  Ahh, so pretty!

Overall, I think the quiche is good.  I didn't even really miss the crust.  It was a little sweet, which surprised me, but I did enjoy it very much and would definitely make it again.  Hopefully patting the squash down will help control some of the excess moisture.  Let me know what you think!

 I enjoyed this delicious quiche with a little salad that my friend Adam introduced me to a few weeks ago. I modified it slightly because I don't love feta, but here is what you see pictured here.  I mixed a little spinach and arugula with some chopped fresh mint, some toasted pine nuts, and a little Panela cheese.  Dress it with just a little rice vinegar and black pepper.  It is so yummy! 

Thursday, March 27, 2014

My Favorite Chocolate Mousse

Chocolate mouse is definitely one of my top 5 favorite desserts. While I'm not really a big chocolate fan, I just love mousse.  Whenever it's on a menu, you know what I'm going to order.  When I was planning my Christmas dinner menu, I decided it would be perfect.  It creamy and rich, but light enough that it doesn't weigh you down after a big meal.  

Now, I didn't blog about it during Christmas because I was overwhelmed making Beef Wellington for the first time, but last weekend I had a cast party at my house, and because I was on Spring Break, I thought the mousse would be a fun addition!  It is really pretty simple to make and aside from the time it takes to set, it's not time consuming either.  

This recipe is from my favorite, Mark Bittman (How to Cook Everything)

You will need:

2 Tbsp. unsalted butter
4 oz. really good bittersweet or semi sweet chocolate broken up (I used Guittard) 
3 eggs - seperated
1/4 c. sugar (divided into two parts)
1/2 c. cream
1 Tsp. vanilla extract (The original memory calls for 1/2 tsp, but I like to add a little extra)


Start by bringing a small pot of boiling water and use a heat-safe bowl as a double boiler to melt the butter and chocolate.  I like to use a bowl big enough to hold all of the ingredients in the end because the biggest problem with this recipe is that it makes a lot of dishes.  Using a big bowl cuts down your dishes by one at least!  Keep stirring until it's melted and smooth.  Then put this chocolate mixture into the fridge to cool.  


While the chocolate is cooling, you can make the other two components.  First, you need to whip the egg whites.  I used my stand mixer, but you could use a hand mixer, or your very own muscles!  Combine the 3 egg whites and half the sugar in a bowl and whip them until you get soft peaks. Then put them in a separate bowl and set them aside.  


Then you need to whip the cream.  Again, I did this in the stand mixer, but I have done it by hand before.  Take the cream, the vanilla, and the remaining sugar and whip it together until you get soft peaks. 

Then you need to get the chocolate out of the fridge and start mixing it together.  Now, the key to this is to start slowly and not to over mix.  It is better to end up with ribbons of light and dark than to compromise the light, fluffy texture of the mousse!


Ok, so start by adding just a spoonful of the egg whites and carefully fold them into your chocolate. Once that is incorporated, you can fold in the rest of the egg whites.  Then fold in the whipped cream.  


   Now, I wish I had a beautiful picture of the finished product, complete with more whipped cream (which you make by just repeating the "whipped cream" stage of the mousse, but we scarfed it down so quickly that I didn't get a chance to take a good shot.  Maybe next time! 

Wednesday, January 22, 2014

Snowy days in PA


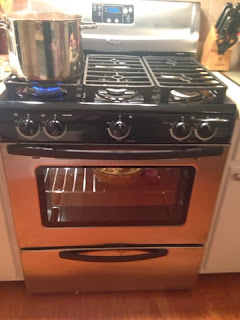
Well, I have to tell you, it has been quite a week.   After much research, himming and hawing, I finally got my new range (thanks, Mom and Dad!)  It's a five burner whirlpool with a griddle that fits over the middle burner.  I really had no idea what I was missing!  Did you know that it shouldn't take an hour to pre-heat your oven?!  It was delivered on Saturday and I christened it with a favorite meal, chili and corn casserole. 

I've posted the recipe for corn casserole before, as well as a good chili recipe, but this chili is a little different.  If the other one is Rainbow Chili, named for the vast array of colorful veggies in it, this one might need to be called Tad's Chili because of it's lack of veggies (zucchini being the most offensive) or it could just be Guy Chili, because it's mostly meat and beans. 

Basically, I take 2 hot peppers, a few cloves of garlic, and an onion and finely chop them in the mini food processor.  Get that softening in a big pot with a little olive oil and then add 2 lbs of ground meat (I like ground beef and pork, personally.)  Brown that up, and while it's browning, season with salt and pepper, finely dice (almost puree) two bell peppers in the mini food processor.  Drain off most of the fat from your meat and add the peppers.  Cook that together for a few minutes, then add a big can and a small can of diced tomatoes and your spices.  

Now, I don't measure my spices, sorry!  I just eyeball it for color and proportions, and then taste as I add.  Start with a big palm full of chili powder, half a palm each of cumin, paprika, and hot Hungarian paprika, and then half that of garlic powder and Cayenne pepper.  Then taste and adjust.  Oh, and salt and black pepper, very important!  Then add in kidney beans.  I do a can each of dark red and light red, but use what you like.  Then just let it all cook together, the longer it cooks, the better it tastes.

This chili is hearty, meaty, and perfect for snowy days, which we have had plenty of this winter!


The next thing I wanted to share with you is another tasty meal for a snowy day.  We got nailed with 10 inches of snow here Tuesday, so I'm working on my 5th day off of school with a cold I got for my birthday Monday.  Last night I made a salad that was so good I was sad I didn't have enough ingredients for another one today.  Or so I thought!  This salad is a little bit different from last nights, but equally good.  If you want last night's, use left over filet with sauteed mushrooms instead of the jalapenos chicken sausage.

   Start by roasting some vegetables.  I did this just like I did in my last post, so if you need instructions, check it out.  I was out of potatoes, so I used butternut squash instead (equally delicious!)  With 10 minutes remaining for the veggies, I slice up some chicken sausage and brown it in a pan with a little olive oil.  Put that on a bed of arugula mix with a little chopped fresh mozzarella. Then, in the same pan, add a little butter, and toast up some big sourdough croutons. I add salt, pepper, red pepper flakes, and Parmesan cheese right at the end.  Then, take your veggies out and throw them on top of the salad, add some croutons, and dress with just a little olive oil and balsamic vinegar.  It was so tasty.  I am not a big salad eater in the winter time, but the roasted veggies and the warm sausage make it so comforting and filling, that you will make this your new go-to cold weather salad.
 
So, hopefully I get back to work again soon because being home this much is spoiling me, and my kitties, rotten.  Stay warm and well fed!

Tuesday, January 14, 2014

Roasted Veggies

I've got to tell you, yesterday I went to Wegmans with nothing but cheese and cream in my fridge. It had gotten pretty busy around here, and even I can only eat so much cheese!  So I headed to my favorite store and loaded up my cart with veggies, fruit, and chili ingredients.  I got home late tonight after a really LONG meeting at school and was so psyched to make dinner. For once in my life I wasn't starving when I got home because I brought yummy snacks (avocado humus, red peppers, and carrots) to share at the meeting, and we order out for lunch.  This gave me time to pre-heat my ancient oven and do some roasting.  Ps.  I'm saying goodbye to my 1970s range Saturday and getting a new one!  I have to admit I'm feeling a little sad to see my old friend go, but I know I'll be able to count on the new one in a whole new way.  Anyway...


I pre-heated my oven to 425 degrees and started chopping up some vegetables.  On a foil-lined baking dish I drizzled a little olive oil, then added my cubed up (and peeled) sweet potato, red potato, turnips, carrots, cauliflower, brussel sprouts, and radishes.  By the way, I had never cooked radishes before, but a friend shared that they were delicious, so I decided to give them a try.  Oh, they were good!

I then tossed them in a little more olive oil, salt and pepper, and put them on the top rack of my oven.  I checked on them a few times, then after about 30 minutes, I took them out and enjoyed them with a grass-fed steak tenderloin, mushrooms, and a few onion rings.  


It was so delicious, and to be honest, I could have just eaten a huge bowl of the veggies.  I don't think I even needed the steak, although it was also very tasty. 
I tried each of the vegetables on their own because I wondered which one I liked the best, and I've got be honest, I'm not really sure I could answer my own question.  The sweet potato was sweet and tender, the sprouts got blackened and crispy, and the radishes were still a little spicy, but I truly was surprised that I think the turnips were my favorite.  Which roasted vegetable is your favorite?  Which ones should I add to my pan?


Tuesday, November 12, 2013

Ricotta Gnocchi with Arugula Pesto and Mushroom Cream Sauce


Several weeks ago I took my first cooking class with my friend, Sandy.  We went to our local Sur la Table, and learned how to make three different kinds of gnocchi, and three different sauces.  We had an awesome time, learned a lot, and ate some serious pasta!

Recently I have hardly been home long enough to turn on the lights before I brush my teeth and fall exhausted into bed, let alone make delicious, blog-worthy food.  Last night I planned to make these Ricotta Gnocchis, but unfortunately I forgot to buy cheesecloth when I went shopping, so I pushed it off till tonight.  

So, here is my first attempt at making gnocchi at home all by myself.  Here goes nothing!

You will need:

For the gnocci:

15 oz. ricotta cheese (I used whole milk, but any will work)
1 egg
4 Tbsp chopped basil
6 Tbsp flour
1/2 c. parmesan cheese
1/2 c. panko breadcrumbs
salt and pepper (1 tsp, 1/2 tsp)

extra flour for the counter etc.
cheesecloth for the ricotta
fork or gnocchi paddle for rolling

For the sauce:

4 c. arugula
1/4 c. toasted pine nuts
1 clove garlic ( I omitted this because I don't enjoy raw garlic)
1/4 c parmesan cheese
1/4 c. olive oil

1 Tbsp olive oil
2 shallots, thinly sliced (or 1 small onion)
12 oz. sliced mushrooms
2 cloves garlic, minced
1 tsp fresh thyme leaves, roughly chopped
1 c. cream
salt and pepper

To start, put a colander in a bowl and line it with cheesecloth.  Then add the ricotta and allow it to drain in the fridge for about an hour.  

Once it's drained (now, I'll admit that there wasn't anything in the bowl after an hour so maybe it's just the moisture that the cheesecloth soaks up?), pulse the ricotta in the food processor to break it up and then mix it in a large bowl with the egg, basil, salt, and pepper.  Then add and fold in the cheese, flour, and panko. 


Flour your work surface, break it into 4ths, and roll out one section at a time to a snake about the diameter of your thumb.  

Use a bench scraper or knife to cut off little pieces, and then gently roll them down the back of a fork.  Put them on a floured cookie sheet and cover them with a kitchen towel until you are ready to cook them. 


Now, I actually decided to prep my sauce and make the pesto part of the sauce while I was waiting for the ricotta to drain.  Put the arugula, nuts, cheese, and garlic in a food processor, pulse it for about 20 seconds, and then while it's still running, stream in your oil.  


Then get the other part of your sauce going before you drop your gnocchi.  Oh, and you may as well get some water boiling (a big pot!)  In a large pan, heat your oil over med. high heat and saute your shallots or onions until they are soft.  Then add your mushrooms.  Now, they will go through a stage where they look too dry and you will be tempted to add more oil.  Don't!  They will power through and soften up, get brown and delicious, just be patient.  Once they they are cooked, add the garlic, thyme, and season to taste.  Then you can add the cream and let it simmer.  Finally, add the pesto to taste and simmer it until your gnocci is cooked.  


This looks much less green than it does in real life...  Sorry!
So, now salt your boiling water and add your gnocchi in batches.  Wait until they float, then give them another minute, scoop them out and add them to your saute pan of sauce. Keep cooking them and adding them until they are all finished. 


 If you can't eat them all, you can freeze your uncooked gnocchi.  Just put them on a sheet pan and put them in the freezer for a while, once they are frozen, throw them in a storage bag or container and keep them in the freezer.  Cook them the same way, no need to thaw them first! What I did was wrap half of my dough in seran wrap and put it in the fridge until tomorrow.  I also set aside half of the sauce.  I may end up freezing some of them, but we'll see how I feel tomorrow!  Tonight, I was too hungry and impatient to roll them all out! This really would be a fun dinner to make with a friend or loved one because you could put them to work rolling the gnocci!


Serve and enjoy!  


Tuesday, September 17, 2013

Sausage, Beans, and Greens Soup

Fall is my favorite season.  Well, if I'm being honest, I would have to admit that my favorite season is whatever season is beginning.  So, really I just like the change of seasons I guess.  I'm rambling.  

Fall is my favorite right now, and besides loving the changing colors, the cool crisp air, and crunching leaves, I love fall foods.  Apples, pumpkins, leafy greens, pies, and my absolute favorite, soups.  This soup was my first of the season.  Oh, by the way, as soon as I start back to school in September, it's fall in my book, forget the calendar.

This soup was so yummy that I'm a little sad it's all gone.  I loved eating it with a hunk of good bread to soak up the broth.

You will need:

  • about a lb. of hot italian turkey sausage (removed from it's casing)
  • 1 small onion, diced
  • 1 large shallot, diced
  • 2 cloves of garlic, diced
  • about 5-6 cups chicken stock
  • a large bunch of swiss chard, chopped roughly
  • 2 cans of Great Northern White Beans
  • Salt, pepper, and red pepper flakes
 Start by browning your sausage in a big soup pot.  Once it has started to get some good color, add the onion, shallot, and garlic.  

Let these cook down and get soft, maybe 3-5 minutes after you add the veggies.  Stir them occasionally to keep everything cooking evenly.  If you have a lot of fat, drain it.  Turkey sausage usually is very lean, so I didn't need this step.


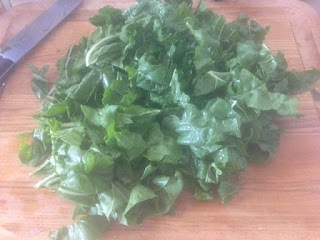
While this is cooking together, go ahead and chop up your swiss chard.  I like to pull the leaves off of the stems, and then just give them a nice rough chop.  It will cook way down, so don't worry too much about the size.  

 
Then add the swiss chard, rinsed white beans, salt, pepper, red pepper flakes (to taste), and the chicken stock.  I just eyeball the stock.  I like my soups to be hearty, so I go a little light on the stock.  If you like more broth, add more stock. 
Give it a taste to make sure your seasonings are how you like them (I prefer heat over salt :), bring it to a boil, then let it simmer for about 15-20 minutes.  I topped mine the first two nights with a little Parmesan cheese, but it's not at all necessary.  Serve it up with a hunk of good bread (I love Wegman's garlic tuscan bread, or 7 grain sourdough.)  It makes about 5-6 good sized servings.  
 

Saturday, August 24, 2013

Kale and Watermelon Salad

Two weeks ago my colleague and friend, Candy and I spent a week in NYC at the Columbia Teacher's College Reading Workshop Project.  We learned so much about reading, took in two Broadway shows, and ate so much delicious food!  One of the things that I absolutely loved was a salad very much like the one I'm about to tell you about.  The funny thing was, it wasn't even my meal!  I tried one bite of Candy's salad and had to make my own version of this at home.  Neither of us could remember exactly what was in it, but I think I got the key components and made a few changes based on my tastes.  I'm not sure I'll go so far as to tell you it was better than the one we ate in NYC, but it certainly was delicious!

You will need:

1.5-2 cups of chopped raw kale
1 cup of watermelon, cubed
1/2 cup ish of quartered cucumber
1/2 an avocado, chopped
1/4 cup of warmed hazelnuts

Lime Vinaigrette: (This serves 3)

Juice of 1 lime
equal parts olive oil and champagne vinegar (maybe 4 Tbsp. each)
salt and pepper

So basically, heat a dry saute pan and warm your hazelnuts over very low heat until you smell them, then take them off the heat.  While they are heating through, chop everything, make your dressing, and put it all together in a bowl.  Last, add your warmed hazelnuts, eat and enjoy.  

The bitterness of the kale is balanced by the acidity of the lime and the sweetness of the watermelon.  Try and get every component in each bite, it's so perfect!  I will definitely be making this one again and again!


Sunday, August 18, 2013

S'mores Bars


I don't bake.  No, seriously.  Baking and I broke up long ago and it was just too painful to even try to be friends.  If I'm being honest here, putting something in the oven relinquishes too much control of the process for me.  Come on, I'm a Kindergarten teacher, and you thought I didn't know I have a few small control issues?  Wrong.  Anyway, as I just mentioned, I'm a teacher and last year I had a parent of a child in my class who was an amazing baker.  She made us these S'mores bars for the winter holidays, and then, because of the way we all raved over them, again at the end of the school year.

After the first time eating them, I insisted on her sharing the recipe.  Again, if I'm telling the whole truth, I asked for it so that I could get one of my "baking inclined" friends (I'm looking at you, Christine!) to make them for me.  So, after 6 months of waiting for them to magically appear before me, I got tired of waiting. (I'm really only patient with children...) It was time to make things happen for myself.  

My friend, Allie was having a big BBQ and I decided this was my chance.  I had plenty of time to figure something else out if they didn't work, so I went for it!  

Let me tell you how good it feels when you sit at a party and hear person after person walk by with just a bite of something you made left saying, "Oh, man, these are SO GOOD!  Who made them?"  I was proud.  I also felt a little protective of the recipe.  So much so, in fact, that I almost didn't share it here.  And also, remember, it's not even my recipe!  I got it from a parent who got it from somewhere else.  But trust me.  Make these.  They are worth it. 


Spicy Smoky S'mores Bars
Recipe courtesy Anne Thornton
Prep Time:
20 min
Inactive Prep Time:
2 hr 0 min
Cook Time:
20 min
Level:
Easy
Serves:
24 servings

Ingredients
     2 sticks unsalted butter, melted, plus more, softened, for pan
     18 plain graham crackers (about 2 packages)
     1/4 cup sugar
     1/2 teaspoon fine sea salt
     3 cups milk chocolate chips
     1/2 teaspoon chipotle pepper powder, optional
     3 1/2 cups mini-marshmallows

Directions

Preheat the oven to 350 degrees F. Line the bottom and sides of a 9 by 13-inch baking pan with foil. You want to leave about 4 inches of overhang on the 2 opposite sides. These are going to serve as your handles to remove the bars from the pan in 1 piece, so make sure that there is enough of the overhang for you to have a solid grip. Grease the foil well with the softened butter.
In your food processor, grind the graham crackers into a fine meal (you need 2 cups). 


In a large bowl, combine your crumbs with the sugar, sea salt and melted butter. The mixture should look and feel like wet sand. Set aside a heaping 1/2 cup of the crumb mixture for the topping. Evenly press the remaining crumb mixture into the bottom the foil-lined pan. Pop your crust into the oven and bake until it is golden brown and your kitchen smells of graham crackers, 12 to 15 minutes. 


Remove the crust from the oven and allow it to cool on a rack or on a dishtowel on your counter.


Melt the milk chocolate in a saucepan over low heat, stirring continuously until fully melted. Do not turn up the heat to hurry this process, you must keep it on low. Alternately, you can microwave the chocolate on low power, stirring after 2 minutes. Once the chocolate is fully melted, it's time to add the chipotle pepper powder, if using, and stir it in completely.  I didn't use it because I was taking these to a party, but next time I will totally try it!


Preheat the broiler.

Pour the melted chocolate over the cooled graham cracker crust. Spread the chocolate evenly over the crust with a butter knife. Sprinkle the marshmallows over the chocolate and press them lightly into the chocolate. 


Sprinkle the reserved crumb mixture over and in between the marshmallows so that you cannot see the chocolate peaking through the marshmallows. 

Broil the bars 6 inches from the flame until the marshmallows are golden brown, 1 to 2 minutes.

Refrigerate the bars until the chocolate is hard, 2 hours or so. Grab the ends of the foil liner and lift the bars out of the pan in 1 piece. Move to a cutting board and cut into 24 squares.  

I would normally be the first person to tell you that 24 tiny bars is too many and that you should make the squares bigger.  In this case, the dessert is so sweet and buttery, that you really only need one small one (at a time, anyway!)  

So, I've given away my only secret baked dessert weapon (so far), and I hope that you go on to make them, share them, and swoon over them the way that I do.  Trust me, if I can bake them, anyone can!  Let me know how they go for you!


Sunday, August 4, 2013

Eggplant pizzas

I have a few "black hole" type time sucks on the internet, with Pinterest being one of the big ones.  The good thing is that sometimes I get really great recipes and recipe inspirations.  This one was based originally off of a Julia Child recipe, and then was adapted by this website http://www.joysama.com.  I made a few changes based on what I had around, but wanted to credit my source of inspiration!

These took a little bit of time, but were super easy and delicious!  I made these for 1, so double, triple accordingly.

You need:

1 medium sized eggplant
2 tomatoes diced
1-2 cloves of garlic minced
1 small shallot minced
1 tsp. tomato paste
olive oil
dried pizza seasoning
oregano
basil
salt and pepper
pizza cheese, shredded

Start by pre-heating your oven to 375 degrees and slice your eggplant to about 1/2 inch slices.  Liberally sprinkle both sides with salt (I use kosher or sea) and then let them sweat out their moisture on two stacked paper towels for 30 minutes.  
 

 While they are sweating it out (which keeps them from getting rubbery when roasted), you can get your sauce ready.  I chopped up the garlic and shallot and got them cooking over low heat in a little olive oil.  Then I chopped up two tomatoes and a bunch of fresh oregano from my garden (maybe 2 tbsp?) and add them, along with the tomato paste to the saute pan.  Let them simmer slowly until the tomatoes break down a bit and it gets thick and sauce-like.  Then turn off the heat and it will thicken up even a little more than pictured below.

 Once the 30 minutes are up, use a dry paper towel to wipe off the remaining salt, and then place the slices on a baking sheet lined with aluminum foil and sprayed with cooking spay.  Brush each slice with a little olive oil and sprinkle some pizza seasoning on them.  Pop them in the oven and bake for about 25 minutes.  You can then julienne your basil (stack the leaves together, roll them up, and slice them thinly into little ribbons.)
When they come out, top each one with some of the sauce, some basil ribbons, and plenty of pizza cheese!


Lastly, pop them under the broiler for just a few minutes.  I did 5 and it was too long, or I had them too high in the oven because they got a little bit too toasty (although they were still delicious!)  My best advice is, watch them closely!
Here are a few that didn't get as burnt!  These taste so good that I almost felt guilty eating them.  I had to keep reminding myself that really they only "bad" thing for me in it was the little bit of cheese!  Give them a try!