Saturday, October 4, 2014

Shrimp and Quinoa Salad

This Saturday is not the one I had planned, but I'm trying to make the best of it.  I have a cold and have been confined to the couch watching Law and Order: SVU for the majority of the day, but I did manage to get out to gather some ingredients for a baking project that I'll try and tackle later this evening-stay tuned!
Anyway, I pinned a recipe ages ago and decided to give it a try tonight, but I made a few alterations.  I found the inspiration at this blog, but after looking it over, I mostly just made it up as I went along.  This salad was flavorful, had a wonderful mix of textures, and was packed with healthy ingredients!  I waited way too long to try it, don't make the same mistake.  I also think it would be delicious without the shrimp if you wanted to make it vegetarian, but then I would up the quinoa to 3/4 c. instead to up the protein content.

What you need:

2 c. shrimp (I eyeballed this, probably could have thrown a few more in!)
1/2 c. quinoa, uncooked
1/4 red onion, diced
1 can corn kernels, drained and rinsed
1 can black bean, rinsed
1 avocado, cubed
1 clove garlic, minced
5-6 good sized leaves of basil, cut into ribbons
olive oil for sauteing shrimp

Vinaigrette

juice from 1 lemon
1 Tbsp rice wine vinegar
3 Tbsp good olive oil
salt and pepper

Start by cooking the quinoa according to the package, I used a tri-colored variety and it calls for a 2/1 ratio for liquid to grain.  Get that going, then saute the shrimp in a little olive oil and the garlic, just until they are pink- it only takes a few minutes.  While that is cooking, mix up your other ingredients, except the basil, in a large bowl.  Season it all with salt and pepper and then make the dressing.  I just added all of the vinaigrette ingredients to a small jar and shook it up, but you could whisk it if you want.  I only used half of the dressing and put the rest in the fridge for another day.  Once the quinoa and shrimp are cooked, add them in to the mix and stir it all together.  I sprinkled my bowl with the fresh basil just before eating so it didn't get warm or lose that bright green color.  
I hope you enjoy this dish as much as I did.  It was a delight!

Tuesday, September 23, 2014

Ultimate Mac and Cheese


I know I have posted other mac and cheese recipes, or at least one, but don't make that one.  Seriously, don't make any other mac and cheese because this one is the only one you will ever want from now on.  I made it over the summer for a cast bonding party for a show I was directing and it was a huge hit.  It was a recipe that I got from a friend who made it for a party 3 years ago.  That should tell you something, that this dish stuck with me for years, prompting me to solicit her for the recipe.  I made it as it read the first time, but today I made a few changes and I think it's even better.  Thanks go out to Martha Stewart for the first recipe, and for Christine for sharing it!

You could definitely double this for a crowd, and in that case use a 9x13 dish, but I'm listing it as I made it tonight.  I'm guessing it would feed 6.

You will need:

4 slices of white bread, crusts cut off and cubed small-.5" pieces
4 Tbsp. butter, plus a little to grease the baking dish
2 c. 1% milk
3/4 c. light cream
1/4 c. flour
1 tsp. salt
pepper, nutmeg, and cayenne pepper to taste (about 1/8 tsp)
1/2 lb elbow macaroni 
1 1/2 c. white cheddar cheese, shredded
1 c. gruyere, shredded
A little extra cheese for the top, about 1/2 cup (I had some shredded pecarino romano in the fridge so I added that also.)

Start by pre-heating your over to 375 degrees and start your milk and cream heating over med. heat, then melt 1 tbsp butter.  Toss your bread cubes in a bowl with the melted butter and set that aside.  In a larger sauce pan melt the rest of the butter and when it bubbles, slowly whisk in the flour until it is a nice thick, bubbly rue.  Then you can start adding the warm milk, a little at a time - keep whisking!  
Take a break from whisking to start a big pot of salted water over high heat and when it comes to a boil, add the pasta.  Cook the pasta for 2 minutes under the recommended cook time from the box, drain it, and rinse it in cold water.  While the pasta is cooking, keep whisking the milk, flour, and butter mixture over med/low heat until it is nice and thick.  Once it is thick, remove it from the heat, stir in the salt, pepper, cayenne, and nutmeg, and then add the two cups of cheese and stir until it is melted and incorporated.  Put the pasta and cheese sauce back in the big pasta pot and stir it all together. 


Pour the mixture into your greased baking dish (1.5 qts), top with some extra cheese and the bread crumbs.  Bake at 375 for 30 minutes.


This is honestly one of the best things I've ever made.  I sprinkled it with a little more cayenne before I dug in, and trust me, it was hard to wait long enough to take a picture.  I can't wait for leftovers.  Please try it and let me know what you think!

Thursday, August 7, 2014

Quiche Conquering Day

Happy Thursday!  I know it's been pretty quiet here this summer, but I made something pretty yummy today and thought it was worthy of sharing, if only because I'm so proud that I finally figure this one out.  Quiche.  I know, so simple, right?  Well, while that might be true I have never been able to make it myself and it's one of my favorite foods, so today was a big day in the Franklin house!  

If I'm being honest, which I always am, I have to admit that quiche totally intimidates me, and yet I find it so enticing.  It's buttery, flaky crust combined with cheesy, flavorful filling, how can you go wrong?  Well, I did.  Over and over again; until today!  Now, I will also admit that I used a pre-made crust because I had one in the freezer and I figured I would tackle this one step at a time.  I feel like next time I could try and make my own dough.  Anyway, on to the recipe.  

I based my recipe on my old standby-Mark Bittman, but I added the mushrooms.  

You need:

1 deep dish pie crust (I had a bunch of filling left over and happened to have fillo cups in my freezer, so I made 24 mini quiches as well)
6 eggs
2 cups of milk, cream or a combo (I used 1.5 c 2% milk and .5 c cream)
2 c. shredded cheese (I used white cheddar)
1 c. chopped mushrooms (I used a mix of button and baby bellas)
2 Tbsp. chopped herbs (chives and parsley for me)
good pinch of cayenne pepper
salt and pepper
little butter or olive oil for cooking the mushrooms

Pre-heat your oven to 425 degrees and when it's ready, bake your crust for about 15 minutes.  While that's baking, get out your eggs and let them come to room temp. Heat a med. skillet to medium heat with a little olive oil or butter (I like a little of both) and then add your chopped mushrooms.  Let them cook until they are brown and tender.  Don't forget that mushrooms go through a dry phrase, so don't add more oil or butter, be patient!  Then salt and pepper them and set them aside.  Heat your milk just until it starts to steam and then start mixing all of your ingredients together except the mushrooms. 

Take the crust out of the oven, whisk your eggs together and slowly add the warm milk.  Do that slowly, a little a time to start so you don't accidentally scramble your eggs (temper them).  Add the cheese, herbs, and season with salt, pepper, and cayenne.  

Turn the oven down to 325 degrees, put the mushrooms in the bottom of your crust and pour the filling over top.  Put this in the oven and set the timer for 35 minutes (it actually took mine 40, but keep an eye on it).I am not sure if my crust wasn't deep dish, or I just didn't account for the extra space the mushrooms took up, but I had a good bit of filling left over.  So, I pulled out my fillo cups, popped 24 of them in a mini muffin pan, and filled them with the leftover filling (no mushrooms.)  When there are 30 minutes left on the time, add the mini quiches.  

Serve either of these or both warm from the oven or at room temperature.  I ate mine for brunch today with my kale and watermelon salad.  I made a few changes this time, just using kale, watermelon, and hazelnuts, and made the dressing with a little lemon juice, champagne vinegar, olive oil, and a little watermelon juice, salt, and pepper.  It may have been even better!  Oh, and I did a chiffonade of the kale (cut into little ribbons) to make it easier to eat. Even better, the kale came from my garden.  So good!

What is your favorite kind of quiche?


Thursday, July 17, 2014

BAAT- Bacon, Avocado, Arugula, Tomato sandwhich

This really isn't a recipe, just a yummy meal.  As those of you who know me know, avocados are my favorite thing.  They find their way into many of my meals, and according to my friend Sean who is a chef, ones where avocado just don't belong, but I think this one would be just fine. And even if Sean doesn't agree, it was delicious, so I don't care.  
I started with some good hearty whole grain bread.  I got mine at Trader Joes, but really any good bread would work.  I toasted it and spread just a little mayo on it.  If I did it again, I am pretty sure that I wouldn't use it.  The avocado is creamy enough without it.  
So, while my bread was toasting, I cooked three pieces of bacon, sliced up a tomato and the avocado, and went out to my garden and picked some arugula.  Then you just have to layer it up.  
Toast
Mayo
Avocado
Salt
Tomato
Bacon
Tomato
Pepper
Arugula   

This made for a lovely summer lunch.  Enjoy!

Wednesday, July 9, 2014

Zucchini Boat Tacos


I am generally less inspired in the kitchen in the summer time.  I love a garden to table approach, which means I eat a lot salads and smoothies, but the lettuce, kale, and spinach got scorched and pulled, so now it is time for squash.  This recipe was created because I had a bunch of zucchini almost read to be picked, and then I lost three of the four to blossom rot.  So, I halved the squash, used a zucchini from my garden and a yellow squash I had left over from something else, and have half the filling left over.  I'm sure I'll find a good use for it, but below is what you would need for the full recipe.  I'm writing it with zucchini, but honestly, the squash was just as good!  Also, I had left over rice, so I heated that up, but it really didn't need it.

What you need:
4 zucchinis
1/2 salsa (I had medium)
1 8 oz. can tomato sauce
1/2 can of water
1 lb ground turkey
a few tablespoons of diced pancetta (I had this in my fridge and added it for the fat.  It probably isn't necessary, but it was good!)
1/2 an onion, minced (I had a red one)
1/2 a bell pepper, minced (I had yellow)
1-2 tsp each- chili powder, cumin, garlic powder, cayanne pepper, and paprika (I like hot hungarian paprika, but regular would be fine)
salt and pepper
1/2 c. shredded cheddar cheese
1/4 c. green onion, chopped

So, start by pre-heating the oven to 400 degrees.  While it was heating up, I cut the ends off of my zucchinis, cut them long-ways down the middle and scooped out all the seeds.  Put a little salsa in the bottom of a baking dish and then lay your zucchini on top of the salsa.  Then start a large skillet over med-high heat.  If you are using pancetta, start that in the pan and when it gets a little crisp and has rendered some fat, add the ground turkey, salt and pepper to season.  If you aren't using the pancetta, add a little olive oil so the turkey will brown nicely. 
 
Next, while that's browning, mince your onion and pepper.  I use my trusty mini food processor, which was perfect!  Once your turkey is cooked through, add the veggies, tomato sauce, water, spices and some more salt and pepper.  I like things with a little kick, so I was a little heavier with the cayanne and paprika, but season and taste, and stop when its good!  Let this all simmer together for about 5-7 minutes until the mixture gets nice and thick.  

Spoon the filling into your zucchini boats, top with cheddar cheese, cover with foil, and cook in the oven for 30 minutes covered.  I uncovered for the last five minutes to brown the cheese a little, and even did a few minutes in the broiler because it wasn't as brown as I wanted.  Then top it with your chopped green onion.  I served it on a bed of rice, but it really didn't need a starch.  

I'm looking forward to leftovers!


Friday, April 4, 2014

Creamy polenta with roasted balsamic mushrooms


This was a Pinterest find and the original recipe can be found here.  I didn't really change anything, except that I couldn't find stoneground polenta, so I had to use instant.  It was my first time cooking polenta, so I think I let it cook a little too long, but it was still SO GOOD.  

After the long, tear-filled day I had in Kindergarten today (children's tears, not my own), this was just what the Dr. ordered.  It was creamy, rich, salty, and sweet.  I could have eaten the mushrooms all by themselves, but as far as vehicles go, polenta is definitely a winner.  Trust me, try this!  

Now, if anyone knows where I can find stoneground polenta, please let me know!

Friday, March 28, 2014

Asparagus Quiche with Spaghetti Squash Crust

I got the idea for this recipe from Pinterest, but I ended up tweaking it a little bit and have an idea for what I will do differently next time already.  I love quiche, but never make it because the one time I tried before was a disaster!  If I'm being completely honest, I was really nervous about this because really, my favorite part of quiche is the crust.  It's buttery, flaky and oh so delicious...  I'm getting side-tracked!  So, when I decided to try this quiche, I realized that I was just going to go into it with different expectations.  


So, yesterday I roasted my squash.  I used all the muscle I have in order to chop it in half lengthwise, scooped out the seeds, and then roasted it cut side down for about 45 minutes on 400 degrees.  
 I did this step a day ahead because I had the time.  Quiche itself is time consuming, so getting the first step done and out of the way made the whole process go more smoothly. 


So, because I cooked the squash ahead of time, it was scooped out (just scrape it all out with a fork) and cooled by the time I needed to press it into my pie plate.  I pre-heated the oven to 400 and then pressed the squash into it.  I then sprinkled about a handful of grated Parmesan cheese over the squash and then put it in the oven for about 10 minutes.  Now, I did this in hopes that it would help it harden and crisp up a little before I added all the filling stuff, but I'm pretty sure it didn't do anything.  Next time, I'm going to pat it all dry with a paper towel before baking it.  Maybe that will help with the browning.  

Anyway, while that was baking, I peeled a big shallot and threw it in my mini food processor.  I heated a medium skillet with a little olive oil in it and then started the shallots going over medium to medium low heat.  While they are softening up, I cut the ends off of the asparagus (snap one to see where the natural break is, then cut the rest at that same length) and then cut them into 1 inch pieces.  Once you have them ready, toss them into your pan and cook them for just a few minutes.  Don't get them get too soft, just till the green pops and they are tender. Once you get those in the pan, take your "crust" out of the oven.
 
While the asparagus is cooking, mix together 5 eggs, 1 cup of milk, 1 cup of cheese (I grated Gruyere, but Swiss would be good, too, salt, and pepper.  Whisk that all together and then put the shallots and asparagus into the crust and pour the egg mixture over top.  Put it in the oven and let it bake for about 45 minutes.


 Here it is out of the oven.  Notice my beautiful new butcher block counter tops in the background.  Ahh, so pretty!

Overall, I think the quiche is good.  I didn't even really miss the crust.  It was a little sweet, which surprised me, but I did enjoy it very much and would definitely make it again.  Hopefully patting the squash down will help control some of the excess moisture.  Let me know what you think!

 I enjoyed this delicious quiche with a little salad that my friend Adam introduced me to a few weeks ago. I modified it slightly because I don't love feta, but here is what you see pictured here.  I mixed a little spinach and arugula with some chopped fresh mint, some toasted pine nuts, and a little Panela cheese.  Dress it with just a little rice vinegar and black pepper.  It is so yummy! 

Thursday, March 27, 2014

My Favorite Chocolate Mousse

Chocolate mouse is definitely one of my top 5 favorite desserts. While I'm not really a big chocolate fan, I just love mousse.  Whenever it's on a menu, you know what I'm going to order.  When I was planning my Christmas dinner menu, I decided it would be perfect.  It creamy and rich, but light enough that it doesn't weigh you down after a big meal.  

Now, I didn't blog about it during Christmas because I was overwhelmed making Beef Wellington for the first time, but last weekend I had a cast party at my house, and because I was on Spring Break, I thought the mousse would be a fun addition!  It is really pretty simple to make and aside from the time it takes to set, it's not time consuming either.  

This recipe is from my favorite, Mark Bittman (How to Cook Everything)

You will need:

2 Tbsp. unsalted butter
4 oz. really good bittersweet or semi sweet chocolate broken up (I used Guittard) 
3 eggs - seperated
1/4 c. sugar (divided into two parts)
1/2 c. cream
1 Tsp. vanilla extract (The original memory calls for 1/2 tsp, but I like to add a little extra)


Start by bringing a small pot of boiling water and use a heat-safe bowl as a double boiler to melt the butter and chocolate.  I like to use a bowl big enough to hold all of the ingredients in the end because the biggest problem with this recipe is that it makes a lot of dishes.  Using a big bowl cuts down your dishes by one at least!  Keep stirring until it's melted and smooth.  Then put this chocolate mixture into the fridge to cool.  


While the chocolate is cooling, you can make the other two components.  First, you need to whip the egg whites.  I used my stand mixer, but you could use a hand mixer, or your very own muscles!  Combine the 3 egg whites and half the sugar in a bowl and whip them until you get soft peaks. Then put them in a separate bowl and set them aside.  


Then you need to whip the cream.  Again, I did this in the stand mixer, but I have done it by hand before.  Take the cream, the vanilla, and the remaining sugar and whip it together until you get soft peaks. 

Then you need to get the chocolate out of the fridge and start mixing it together.  Now, the key to this is to start slowly and not to over mix.  It is better to end up with ribbons of light and dark than to compromise the light, fluffy texture of the mousse!


Ok, so start by adding just a spoonful of the egg whites and carefully fold them into your chocolate. Once that is incorporated, you can fold in the rest of the egg whites.  Then fold in the whipped cream.  


   Now, I wish I had a beautiful picture of the finished product, complete with more whipped cream (which you make by just repeating the "whipped cream" stage of the mousse, but we scarfed it down so quickly that I didn't get a chance to take a good shot.  Maybe next time! 

Wednesday, January 22, 2014

Snowy days in PA


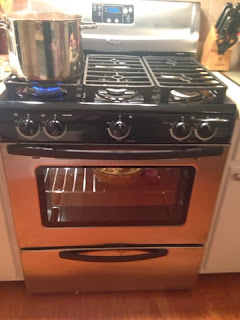
Well, I have to tell you, it has been quite a week.   After much research, himming and hawing, I finally got my new range (thanks, Mom and Dad!)  It's a five burner whirlpool with a griddle that fits over the middle burner.  I really had no idea what I was missing!  Did you know that it shouldn't take an hour to pre-heat your oven?!  It was delivered on Saturday and I christened it with a favorite meal, chili and corn casserole. 

I've posted the recipe for corn casserole before, as well as a good chili recipe, but this chili is a little different.  If the other one is Rainbow Chili, named for the vast array of colorful veggies in it, this one might need to be called Tad's Chili because of it's lack of veggies (zucchini being the most offensive) or it could just be Guy Chili, because it's mostly meat and beans. 

Basically, I take 2 hot peppers, a few cloves of garlic, and an onion and finely chop them in the mini food processor.  Get that softening in a big pot with a little olive oil and then add 2 lbs of ground meat (I like ground beef and pork, personally.)  Brown that up, and while it's browning, season with salt and pepper, finely dice (almost puree) two bell peppers in the mini food processor.  Drain off most of the fat from your meat and add the peppers.  Cook that together for a few minutes, then add a big can and a small can of diced tomatoes and your spices.  

Now, I don't measure my spices, sorry!  I just eyeball it for color and proportions, and then taste as I add.  Start with a big palm full of chili powder, half a palm each of cumin, paprika, and hot Hungarian paprika, and then half that of garlic powder and Cayenne pepper.  Then taste and adjust.  Oh, and salt and black pepper, very important!  Then add in kidney beans.  I do a can each of dark red and light red, but use what you like.  Then just let it all cook together, the longer it cooks, the better it tastes.

This chili is hearty, meaty, and perfect for snowy days, which we have had plenty of this winter!


The next thing I wanted to share with you is another tasty meal for a snowy day.  We got nailed with 10 inches of snow here Tuesday, so I'm working on my 5th day off of school with a cold I got for my birthday Monday.  Last night I made a salad that was so good I was sad I didn't have enough ingredients for another one today.  Or so I thought!  This salad is a little bit different from last nights, but equally good.  If you want last night's, use left over filet with sauteed mushrooms instead of the jalapenos chicken sausage.

   Start by roasting some vegetables.  I did this just like I did in my last post, so if you need instructions, check it out.  I was out of potatoes, so I used butternut squash instead (equally delicious!)  With 10 minutes remaining for the veggies, I slice up some chicken sausage and brown it in a pan with a little olive oil.  Put that on a bed of arugula mix with a little chopped fresh mozzarella. Then, in the same pan, add a little butter, and toast up some big sourdough croutons. I add salt, pepper, red pepper flakes, and Parmesan cheese right at the end.  Then, take your veggies out and throw them on top of the salad, add some croutons, and dress with just a little olive oil and balsamic vinegar.  It was so tasty.  I am not a big salad eater in the winter time, but the roasted veggies and the warm sausage make it so comforting and filling, that you will make this your new go-to cold weather salad.
 
So, hopefully I get back to work again soon because being home this much is spoiling me, and my kitties, rotten.  Stay warm and well fed!

Tuesday, January 14, 2014

Roasted Veggies

I've got to tell you, yesterday I went to Wegmans with nothing but cheese and cream in my fridge. It had gotten pretty busy around here, and even I can only eat so much cheese!  So I headed to my favorite store and loaded up my cart with veggies, fruit, and chili ingredients.  I got home late tonight after a really LONG meeting at school and was so psyched to make dinner. For once in my life I wasn't starving when I got home because I brought yummy snacks (avocado humus, red peppers, and carrots) to share at the meeting, and we order out for lunch.  This gave me time to pre-heat my ancient oven and do some roasting.  Ps.  I'm saying goodbye to my 1970s range Saturday and getting a new one!  I have to admit I'm feeling a little sad to see my old friend go, but I know I'll be able to count on the new one in a whole new way.  Anyway...


I pre-heated my oven to 425 degrees and started chopping up some vegetables.  On a foil-lined baking dish I drizzled a little olive oil, then added my cubed up (and peeled) sweet potato, red potato, turnips, carrots, cauliflower, brussel sprouts, and radishes.  By the way, I had never cooked radishes before, but a friend shared that they were delicious, so I decided to give them a try.  Oh, they were good!

I then tossed them in a little more olive oil, salt and pepper, and put them on the top rack of my oven.  I checked on them a few times, then after about 30 minutes, I took them out and enjoyed them with a grass-fed steak tenderloin, mushrooms, and a few onion rings.  


It was so delicious, and to be honest, I could have just eaten a huge bowl of the veggies.  I don't think I even needed the steak, although it was also very tasty. 
I tried each of the vegetables on their own because I wondered which one I liked the best, and I've got be honest, I'm not really sure I could answer my own question.  The sweet potato was sweet and tender, the sprouts got blackened and crispy, and the radishes were still a little spicy, but I truly was surprised that I think the turnips were my favorite.  Which roasted vegetable is your favorite?  Which ones should I add to my pan?